🚀 Usage Demo
Note: Demo is only used to demonstrate the introduction and use of the SDK, and is not a complete application.
We strongly recommend that you first run the framework-related examples we have prepared for you DEMO. This will not only allow you to intuitively experience the functionality of OpenIMSDK but also help you quickly identify and resolve issues during the actual integration process.
❗️Common Questions
1. Developing Only H5 and Mini Programs
- If you are not developing for the App platform, use the JSSDK for H5 and Mini Program development. No need to follow the steps below.
2. Using Uni for Multi-Platform Development (APP, H5, Mini Programs)
- To run on iOS and Android, it is mandatory to install native plugins. The middle layer
openim-uniapp-polyfillcombines App native plugins and JSSDK capabilities, enabling unified development across APP, H5, and Mini Programs with the same codebase (SDK and im-server version >= 3.8.2).
3. About Dependencies
@openim/client-sdk: JSSDK, required for running H5 and Mini Programs.
App native language plugins: Required for running on iOS and Android.
openim-uniapp-polyfill: Mandatory. It encapsulates JSSDK and native plugins, enabling unified development across multiple platforms.
⚙️ Integration Steps
1. Add Dependencies
- Install dependencies using npm:
npm install openim-uniapp-polyfill @openim/client-sdk
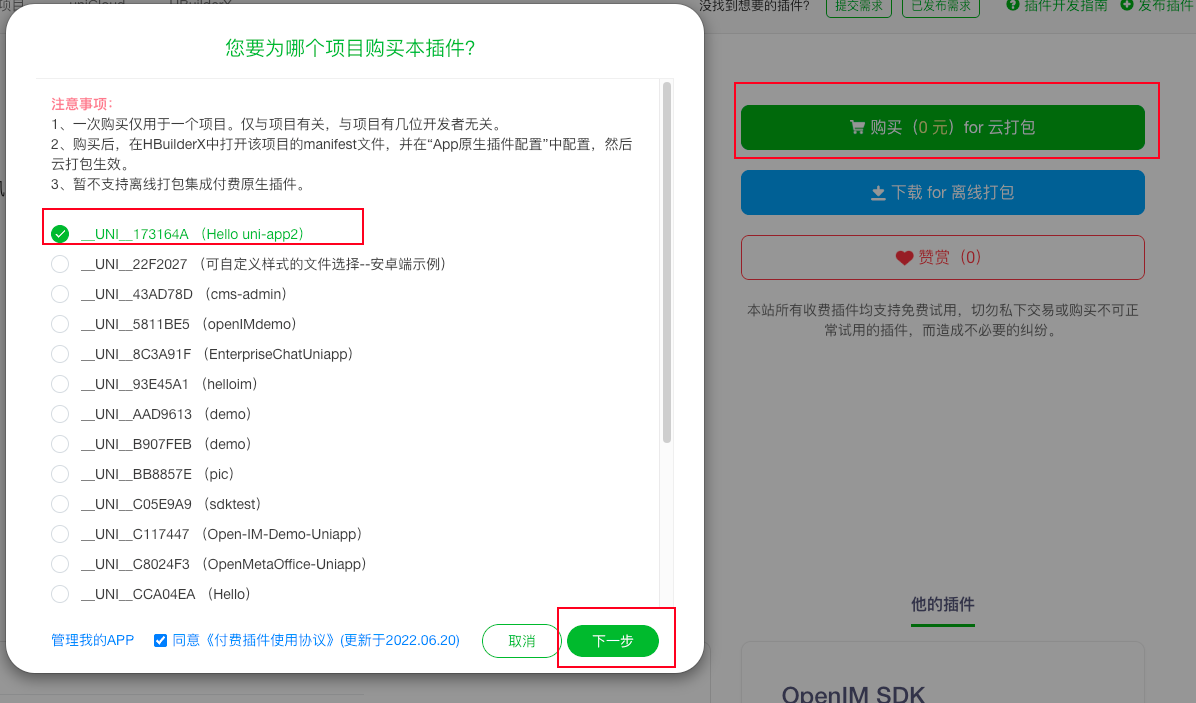
- dcloud Plugins Market Select the appropriate project and package name to import the SDK

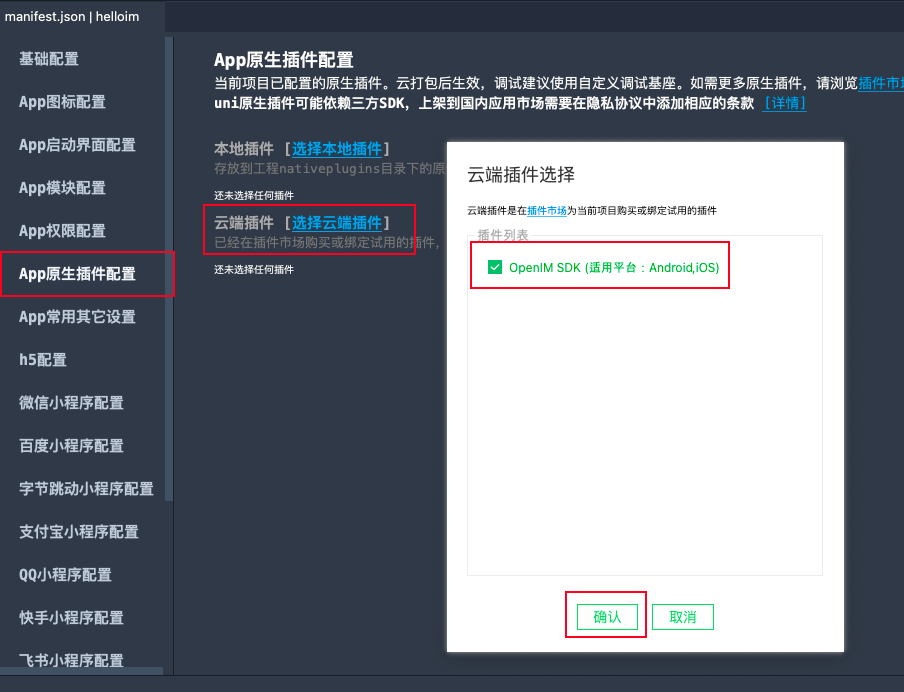
- Open the
manifest.jsonfile in the root directory of the imported SDK project, select App Native Plugin Configuration, and import the cloud plugin.

2. Import in Project (Pure APP Project)
import IMSDK from 'openim-uniapp-polyfill';

IMSDK.asyncApi('login', IMSDK.uuid(), {
  userID: '123',
  token: 'token',
});

const onConnectSuccess = () => {
  // Connection successful
};
// Set up listener
IMSDK.subscribe(IMSDK.IMEvents.OnConnectSuccess, onConnectSuccess);
// Unsubscribe listener
IMSDK.unsubscribe(IMSDK.IMEvents.OnConnectSuccess, onConnectSuccess);
3. Import in Project (APP、H5、Mini Program Project)
Note 1: Use uniapp's method to call listeners, passing in methods from
IMSDK.IMEvents, as there is a difference in case sensitivity between JSSDK and APP. This conversion is already handled in the npm package.Note 2: In some APIs, there may be differences between platforms due to platform support. When using them, check the documentation for the respective platform's API and note the differences:
- Depending on the platform, pass the correct
platformID. - Login API parameters may vary.
- On APP you need to initSDK before using it.
- Creating image and file messages uses different APIs, so use conditional compilation to call different methods.
- And so on...
- Depending on the platform, pass the correct
3.1 Usage in Cross-Platform Scenarios
Method 1: If parameters and method names are consistent across platforms, use uniapp's method to call them.
- This is a multi-platform compatible approach. In cross-platform scenarios, check if the API return content structure is consistent.
import IMSDK from 'openim-uniapp-polyfill';

IMSDK.asyncApi('createTextMessage', IMSDK.uuid(), 'text')
  .then((data) => {
    // do something
  })
Method 2: If parameters and method names differ across platforms, use conditional compilation to handle significant parameter differences.
import IMSDK from 'openim-uniapp-polyfill';

// #ifdef H5 || MP-WEIXIN
IMSDK.asyncApi('login', IMSDK.uuid(), {
  userID : '123',
  token: 'token',
  platformID: 5,
  wsAddr: 'ws://your-server-ip:10001',
  apiAddr: 'http://your-server-ip:10002',
});
// #endif

// #ifdef APP-PLUS
IMSDK.asyncApi('login', IMSDK.uuid(), {
  userID: '123',
  token: 'token',
});
// #endif
4. 🛠️ Local Development
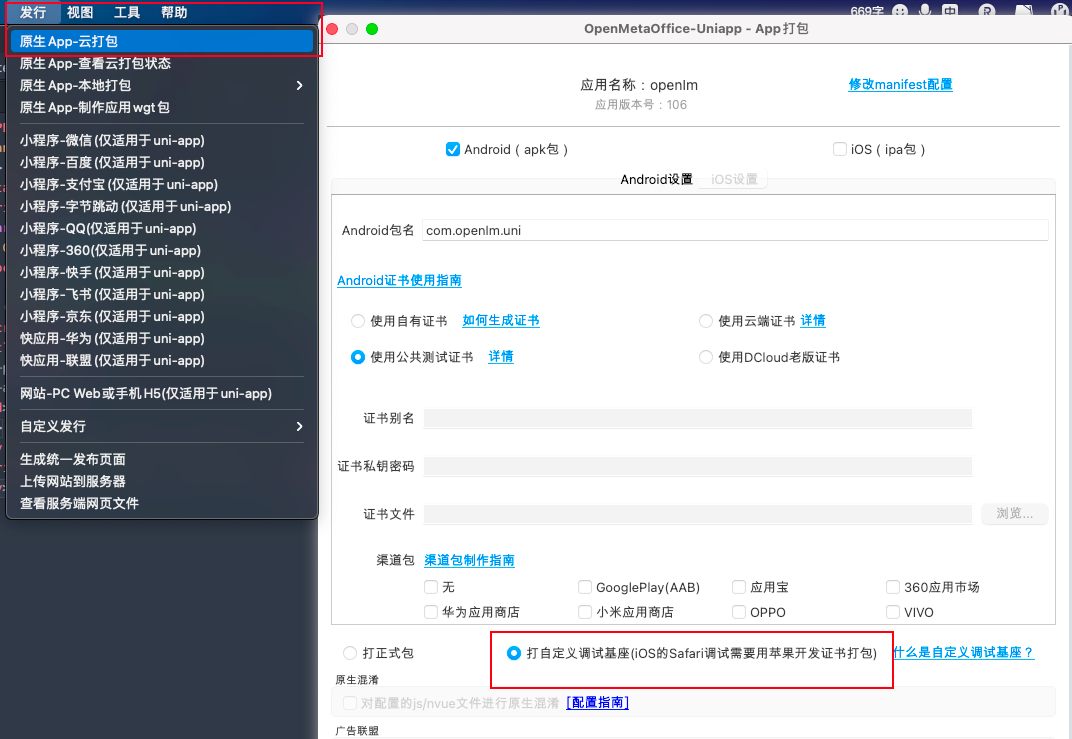
4.1 Create Custom Debug Base
Note: The package name needs to match the package name set when importing cloud plugins in the first step.

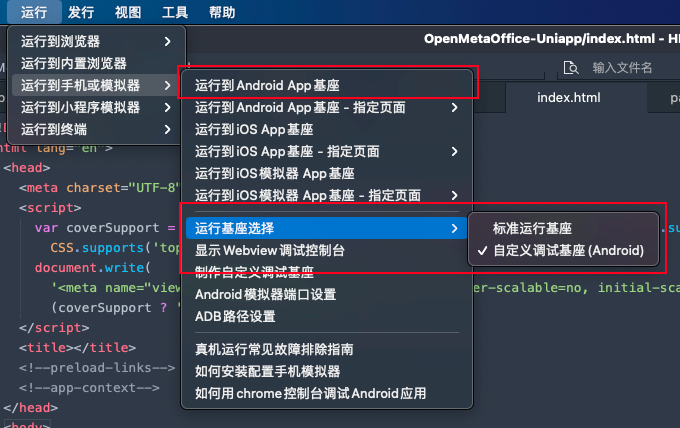
4.2. Run on Custom Debug Base (iOS Only Supports Real Device Debugging)
When debugging the APP side locally, you must package a custom base and start debugging on it.

5. 🚀 Build and Release
For APP platform packaging and release, use Release -> Native APP Cloud Packaging.