基于OpenIM 实现聊天机器人功能
简要描述
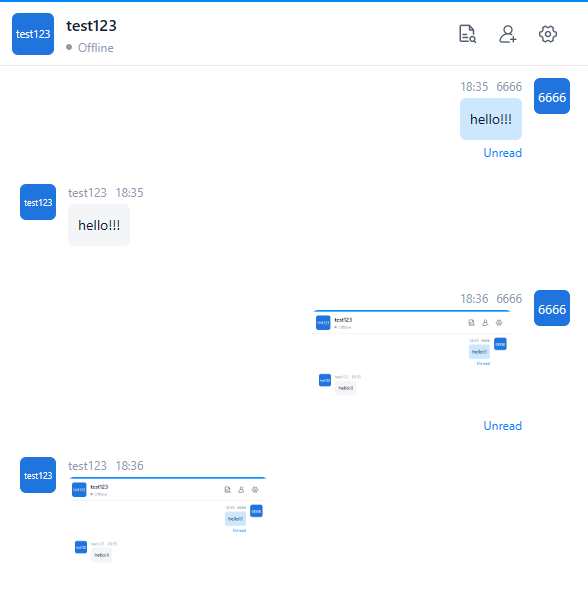
使用 OpenIM 中的 Webhook 机制实现聊天机器人功能。发送文本消息或图片消息给聊天机器人后,机器人会返回相同的消息。开发者可以替换此逻辑,调用LLM接口,以实现智能问答功能。
1. 修改配置文件
将回调的enable设置为true,表示启动该回调。如需要添加新的回调参照 open-im-server 中的 config/webhooks.yml 配置,并在代码层面相应修改。
提示:
url为回调 URL。- 当
afterSendSingleMsg.enable设置为true时,启用该回调。
2. 创建聊天机器人账号
- 登录管理后台,参考 此文档。
- 在用户管理中创建聊天机器人账号,并记录该账号的 userID。
- 为方便体验,可以将此 userID 设置为默认好友。
3. 编写 afterSendSingleMsg 接口
参考以下示例代码。
提示:
- 将例子中的 robotics 替换为第 2 步中获取的 userID。
func (m *ChatApi) CallbackExample(c *gin.Context) {
    // 1. Handling callbacks after sending a single chat message
    msgInfo, err := handlingCallbackAfterSendMsg(c)
    if err != nil {
        apiresp.GinError(c, err)
        return
    }

    // 2. If the user receiving the message is a customer service bot, return the message.
    // 2.1 UserID of the robot account
    robotics := "robotics"

    // 2.2 ChatRobot account validation and determining if messages are text and images
    if msgInfo.SendID == robotics || msgInfo.RecvID != robotics {
        return
    }
    if msgInfo.ContentType != constant.Picture && msgInfo.ContentType != constant.Text {
        return
    }

    // 2.3 Get administrator token
    adminToken, err := getAdminToken(c)
    if err != nil {
        apiresp.GinError(c, err)
        return
    }

    // 2.4 Get RobotAccount info
    robUser, err := getRobotAccountInfo(c, adminToken.AdminToken, robotics)
    if err != nil {
        apiresp.GinError(c, err)
        return
    }

    // 2.5 Constructing the contents of the message field or invoking an LLM to implement AI-driven question answering.
    mapStruct, err := contextToMap(c, msgInfo)
    if err != nil {
        apiresp.GinError(c, err)
        return
    }

    // 2.6 Send Message
    err = sendMessage(c, adminToken.ImToken, robotics, msgInfo, robUser, mapStruct)
    if err != nil {
        apiresp.GinError(c, err)
        return
    }
}
4. 效果展示
